
Help Center
Familiarize yourself with where the options you use most are now located.
What is CAP COM's ABA Routing Number?
CAP COM Federal Credit Union's ABA number is 221373273.
How to Sign Up for Digital Banking
The first time you log in, you will need the member number you received when your CAP COM application was approved. Please call (800) 634-2340 to receive your temporary password.
Website - Online Banking
Log in to your account via CAP COM's website and follow the prompts.
Bonus: If you log in first to Online Banking, the CAP COM app will require no extra setup steps! And, from Online Banking you can access ClickSWITCH to easily switch your direct deposits and automatic payments to your new account.
CAP COM App - Mobile Banking
Download CAP COM's mobile app or Connect-24 Online Banking. You can download the mobile app in the App Store or on Google Play. The first time you launch the app, ignore the login box. Instead, select "Sign up" at the bottom left of your screen and follow the prompts.
Questions? Let us help! Contact our Member Service team at (800) 634-2340.
Online Banking Overview
- The My Accounts section shows up-to-the-minute balance information on your deposit, loan, and investment accounts, as well as options to make a transfer, make a payment or view your spending trends.
- The Account History page shows detailed account information, plus account details like your account number and routing number (if available), make a transfer, view checks and deposits, print your transactions and export your transaction data.
- Transferring Funds - You can transfer funds between your accounts or pay your loan or credit card using the Make a Transfer feature on the Home Page or the Transfer page within Online Banking.
- Download Account Information - The File Export facility allows you to download account information to be imported into Personal Financial Management (PFM) software, including Intuit Quicken™.
Your Online Banking pages are supported by most modern browsers. In order to ensure the best possible experience, please be sure you are using the most up to date versions of the browsers listed below. Your browser will need both JavaScript and cookies enabled to access and operate within the site.
- Microsoft Edge
- Mozilla Firefox
- Google Chrome
- Apple Safari
If you are not using one of the supported browsers listed above, you may encounter issues within your online banking experience. We recommend switching to one of the supported browsers listed above in order to ensure you have an optimal Online Banking experience.
The Online Banking home page is designed to help you complete your everyday money management tasks quickly and easily from one place. In fact, we've brought together the tools needed to perform your most common daily tasks without ever leaving the page. You can easily:
- Check all of your account balances at once
- Take a quick peek at your most recent transactions
- Make a one-time transfer between your accounts
- Transfer funds to select account holders who also bank here
- Make a credit card or loan payment within My Accounts
- Schedule a one-time bill payment
- See where you are spending your money
So instead of switching between multiple pages, you can take action right there on one page to complete several basic functions. We hope you will think of it as your money management control panel.
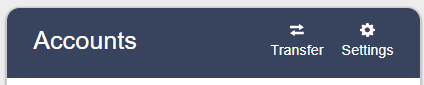
This is where you can see all of your accounts and balances in one glance without having to scroll. In the upper-right portion of My Accounts you will find the Make a transfer icon and link that enables you to make a one-time funds transfer between your accounts and much more. To view the most recent activity for any account, click the Quick peek link. Clicking Quick peek opens a new window that shows the most recent transactions or payment activity for the account along with links to Make a transfer and Go to account history.
We make it easy for you to stay on top of your finances with CAP COM account alerts and reminders. You can customize the alerts and receive them as an email, a text, or both.
Follow the basic instructions for setting up the Low-Balance Alert (below) for any alert you want – balance updates, deposits, withdrawals, payment reminders, and more!
Set a Low-Balance Alert (and Others) in Your Online Account
Log in to your online account.
- Under Additional Services, select Alerts and Notifications.
- Review your email address and phone number (update, if needed).
- Click “Add an alert” and select “Low balance.”
- Choose Checking, set the amount, and specify email, text, or both.
- While you’re at it, set other helpful alerts and reminders!
Set a Low-Balance Alert (and Others) in Your Mobile App
Before launching the CAP COM app, you’ll need to enable its notifications.
Go to your phone’s Settings. Select the CAP COM app and allow notifications.
Now, go ahead and launch the CAP COM app.
- Under More, select Settings.
- Turn on the Low Balance toggle switch under the pertinent account.
- Tap the amount and set it.
In the upper right portion of the My Accounts section you will see the Make a Transfer button. Clicking the button opens the Move Money window. Select the From and To accounts, enter the transfer amount and memo text, if needed, then click the Transfer button. If it applies, the number of transfers available and number of transfers used for the month will be displayed below the account field. NOTE: You can use the switch accounts button to switch the From and To account values.
When you click the Transfer button you will get a message asking you to confirm the funds transfer.
When you click the Make Transfer button a transfer complete window will display with all of the relevant transfer details and the option to or Print the transfer details. Transactions will post immediately when you complete the transfer.
This means that we will automatically refresh the page (to get new account balances) when you close the transfers success window shown below. NOTE: If an issue should occur during the transfer process, an error message will instruct you what to do next.
If you are already using Bill Pay in Online Banking, you can schedule a one-time payment using the Bill Pay widget. If you are not yet a Bill Pay user, the Make a Payment section will display a message about paying bills online. Just click the Go to payments link below the message to go to the Bill Pay enrollment page.
This is where you find how many new and existing offers you have for each eligible account along with the rewards amount that has been earned so far this month. The full list of new and current offers can be found on the Rewards summary page.
The My Accounts section in the upper left area has all of your accounts categorized by type (Deposit, Savings, Loans, etc.) with the current balance and available balance for each account. Within each category group the accounts are listed in alphabetical order by name either the original account name or the account nickname that you assigned.
Your first Deposit account is displayed at the top of the list and shows the balance and available balance. The Total Accounts value is displayed at the bottom of each account section. NOTE: Joint accounts display both the username and account number to better identify which user is on the account.
If available with your online services, you will be able to see the Maturity Date of your CD or Certificate Account in the account bar without having to access the account details. If the maturity date is available, it is displayed as "Matures on MM/DD/YYYY".
Clicking Quick Peek opens a new window that shows the balance and available balance along with the most recent transactions or payment activity for that account. High transaction volume accounts (like Checking) will show 5 days of account activity. Low volume accounts (like loans) will show 30 days of account activity. You will also find helpful links to Make a Transfer and Go to account history at the bottom of the window.
Just click the X button on the top right or anywhere outside of the window to close it. Clicking the account name or the Go to account history link opens the Account History page for that account.
For all loan accounts you will see the balance, next payment amount, a Pay now link (to make the loan payment), interest paid for the current and previous years, recent payments made, and a link to the account history page. Clicking the Pay now link will open the Move money window so you can complete the payment.
For all credit card accounts you will see the balance, next payment minimum amount due, a Pay now link (to make the credit card payment), interest paid for the current and previous years, recent purchases made, and a link to the account history page. Clicking the Pay now link will open the Move money window so you can complete the payment.
To make a loan payment using Move Money:
- Click the Pay link to open the Move Money window
- Select the From account from the drop-down list (the Available dollar amount will be displayed)
- Select the To account from the drop-down list (the Balance amount will be displayed)
- Review the Amount to be paid: Interest + Principal
- Enter brief Memo text, if needed
- Click the Transfer button and review the payment details
- Click the Make Transfer button to complete the payment and display the payment details
- Click Make another transfer to make another transfer or payment, click Print confirmation to print out the payment details, or click Close to close the Move Money window
Click the account name link that you want to open the Account History page for. The page will open with transaction details for your default date range. You can also click on the Go to account history link in the Quick Peek window to directly access the Account History page.
Go to the account you want and click the account name link to open the Account History page. Click the Account Details link in the account summary window. Your full account number will be listed as ACH Number along with with other relevant account details.
When you are finished just click the Hide account details link to collapse the extra information. (NOTE: Your account number can also be found at the bottom of a physical check. It's the last 7-10 numbers on the right side.)
Go to the account you want the routing number for and click the account name link to open the Account History page. Click the See account details link in the account summary window in the upper right-hand part of the screen. If it's available, the routing number will be listed with other relevant account details (please note that the routing number may not be displayed).
When you are finished just click the Hide account details link to collapse the extra information. (NOTE: Your routing number can also be found at the bottom of a physical check. It's the first set of 9 numbers on the left-hand side.)
First go to the My Accounts area and find the account you're looking for. Click the account name link to open the Account History page for that account. The check will display as a link, typically with the check number. Simply click the link to view images of the front and back of the check. Click the Close button at the bottom of the window when you are finished.
First go to the My Accounts area and find the account you're looking for. Click the account name link for that account to open the Account History page.
Print Transactions: Make sure you have your desired date range (e.g., 30 days) or select a different date range using the Change drop-down list. Click the Print icon or link to open a separate window showing the transactions in a printer friendly format. Select a printer, if needed, and click the Print button to send the transaction list to the printer.
Print Check Images: In the Account History page, open the account that you want and then click the check link that you want to print. With the check images displayed, click the Print icon or link. Select a printer, if needed, then click the Print button to send the check images to the printer.
- Click Settings in the accounts section within Online Banking.
- Find the account you want and type the new name in the Nickname column field.
- Repeat this for each account that you want to change.
- When finished, click the Done button.
- You should see your account nicknames the next time you log in to Online Banking.
NOTE: These changes can take up to five minutes or more to take effect.
Your account categories have been set up to automatically display in a certain order: Checking, Savings, Money Market, Certificate of Deposit, Credit Cards, Mortgage Loans, etc. However, if you happen to have multiple accounts within a given category (e.g., two or more savings accounts), you can change the display order of those accounts.
The account names or nicknames within a category appear in alphabetical order, so you can change the account nicknames so the accounts display in the order you want, e.g., "My Savings Account" will display before "zAdvantage Savings Account" because of the added 'z'.
The Move Money option is used for one-time transactions - transfer funds or make a credit card or loan payment. If available, additional options for scheduled recurring transfers, external transfers or wire transfers may be found within the main Online Banking pages.
Account History
We hope that you will take a few moments to try all the buttons and links to see what the Account History page can do. It still has the transactions for all of your accounts, credit cards and loans. In the upper left of the page you will see the account name with the last four digits of the account number. Next to the account name and number there's a Change Account link that lets you quickly switch from your primary account to another account.
Below the account name you'll find the current date range for the transaction list (for example, April 2 - April 11, 2012) and you can use the left and right buttons next to the date range to go forward or backwards in time to explore adjacent transactions. You can also switch to another time period using the date range dropdown.
To the right of the date range you will see the Make a transfer icon and link that opens the Move Money window where you can make a one-time transfer between your accounts or transfer funds to a customer/member you have previously set up with us. You can also use Move Money to pay your credit card bill or make a loan payment.
To the right of Make a transfer you will find the Export icon and link. When selected it opens an Export window that enables you to export your transactions. To the right of the Export link you will find the Print icon and link that open a new window with the transactions presented in a print-friendly format. At the upper right of the page you will find balance information displayed for that account (e.g., Balance and Available Balance).
Just below the Transfer, Export and Print links are fields that help you search for specific transaction types (check, deposit, etc.), payees, check numbers or amounts. You can select the transaction type in the Narrow type dropdown field (Any, the default = all transaction types available). Then use the containing field to enter exactly what you are looking for: a payee (like Target or Safeway), a check number or specific dollar amount. The system will refresh the page with anything that matches your search criteria within the selected date range. If no results are returned, you will have the option to widen the search range of dates.
On the New History page you can:
- View transactions for all of your available accounts
- Change the date range to view additional transactions
- Change the default date range that is used
- Change the transaction sort order and make it the default
- Search for transactions, payees or amounts within a selected date range
- Print out transactions for a selected date range
- Export transactions for a selected date range
- Make a one-time transfer between your available accounts
- Make a credit card or loan payment using Move Money
- Find and use Rewards program offers
Your account transactions area is located on the left side of the screen and takes up most of the page. This is where you can see the most recent account activity sorted by date with your most recent transactions at the top.
You can also access older transactions for that account using the forward/backward buttons to go forward or backward in time. You can also change the date range using the date range dropdown list.
Each transaction shows the most relevant information for the type of account that's selected. For example, a checking account might display date, description, deposit, withdrawal, and balance. NOTE: If Memo text is added for a check transaction, the memo will appear in the Description column.
You can now export your transactions from the Account History page using two basic export options: Comma Separated Value (.csv) and Open Financial Exchange (.ofx) formats. CSV can be used with Excel or similar software while OFX is used by some software vendors to export transaction data.
Both types are available for all accounts and will extract all transactions within the selected date range. Soon you will also be able to use export formats for Quicken (QFX) and QuickBooks (QBO) directly on the Account History page.
NOTE: If no transactions are available for an account within the selected date range, the Export button will be grayed out (disabled) and cannot be selected.
To export to Excel using Firefox*:
- First make sure that you have the date range for the data you want to export (month, 30 days or custom date range).
- Click the Export button with CSV selected (the default).
- Select the Open with Microsoft Excel radio button (or you can select a different export option from the dropdown list).
- Click the OK button to open the Downloads window with the downloaded file at the top of the list.
- Double-click the file to open the data in Excel.
*These steps may vary depending on the browser type you are using.
Yes you can copy data from the transaction list and paste it into standard spreadsheets like Excel. Just highlight and copy the data you want (e.g., date, description or amount) and paste it into a row of the spreadsheet or anywhere you want (Word doc, notepad, etc.).
To switch from viewing your primary account, just click the Change account link or drop-down arrow to open a list of your active accounts. The current account is highlighted on the list but just click on a different account name to select it. When a selection is made the page refreshes with the transactions for the new account.
The transaction list shows your most recent transactions in descending order by date for the date range displayed. The transaction description appears on the first line along with other relevant information (e.g., amount and balance). If there is a Rewards program offer for any transaction it will display on the second line. If the transaction is a check, you can click the check number link to see the front and back of the check image.
You may have noticed the Make a transfer icon and link in upper right corner of the transaction list. Just click the icon or link to open the Move Money window.
Just below the Make a transfer, Export and Print links you'll find a Show items containing field that allows you to filter your search for a specific item or group of items by entering key words in the field. You can use numbers, letters, or a combination of the two (e.g., Target, 25.00, #1234, etc.).
The system will return all of the results that match the key word(s) for the selected date range in the transaction's list located just below the filter field. For example, entering 'Chev' in the field returned results for Chevron.
The system combs through the Description, Deposit and Withdrawal columns based on the selected date range and displays any matching values. If no matches were found, the system will prompt you to Try last 90 days and use a wider date range.
Selecting the Try last 90 days link resets the date range to the past 90 days. Otherwise, you can click the Clear link to remove the current filter values and start over.
To use filtering:
- First make sure that you have the date range that you want to search (month, 30 days or custom date range).
- Enter the specific value that you are looking for in the Show items containing field. (The page will refresh again to show only the matching items.)
- If the system could not find any match, you'll have the option to Try last 90 days or click Clear to start over.
- If you still weren't able to locate the item you want, consider adjusting the date range further and try again.
You can change the date range by selecting your desired date range from the date range dropdown list. To make the new range your default date range, choose Always use this date range from the date range dropdown list. The options that can be used to set the date range are: 10 day, 30 day, or monthly increments. NOTE: Custom date ranges are not allowed as a default.
When you set a new date range as the default, the system displays a temporary green check mark to the left of the new value. Otherwise, a warning icon will alert you that the new date range was not saved. If an error condition should occur, just try selecting Always use this date range again.
Temporarily Changing the Date Range
You can use the handy left and right buttons to go forward or backwards in time to explore adjacent transactions. Or to select a different date range just click on the date range dropdown and select another time period.
Use a Custom Date Range
To enter a custom date range, click the From calendar icon and use the « » controls to navigate to the month you want and click on the date you want. Repeat those steps for the to calendar icon and click the Go button to display transactions for the new date range.
By default your sort order is date descending (meaning that the most recent transactions are at the top). If you would like to change the default sort order, click the arrow to reverse the sort to date ascending (oldest transactions at the top) and your preference will automatically be saved. NOTE: Saving your default sort order only applies to the Date column.
If you want to change the sort order just click on another column header, except for the Balance column which cannot be sorted. NOTE: If the sort order of any column is changed (other than Date), the Balance column will not be displayed.
If this feature is available, whenever you have a check transaction in the list it will be displayed as an active link if the check image is available. Just click the link to view the check in an area that opens below. Then click the Close button (in the upper right part of the window) when you are finished.
NOTE: You will not be able to access check images that have been available for more than 120 days. For expired checks, the check number will no longer display as an active link but instead it will be a solid number.
Typically all check images are displayed online for 90-120 days, then they expire and can't be displayed. An expired check displays a solid check number (not as an active link) and can no longer be selected.
NOTE: If you need to view a check image for a specific check that was cashed more than 120 days ago, please contact Customer Service or your local branch to see if the check image can be retrieved for you.
In the upper-right portion of the transaction history list, you will also find a Print icon and link that, when selected, opens a new window with the transactions presented in a printer-friendly format. The transactions that are printed match the same date range of the transactions that are displayed on the page. The standard browser Print window opens over the transaction list and gives you the option to select another printer (if needed). Clicking the Print button sends the transaction list to the printer.
Click the link provided to view the check image. With the check image open, click the Print icon or link that's above the transaction list. The front and back of the check are displayed and the standard browser Print window opens over the check images. You can select another printer (if needed), then click the Print button to send the check images to the printer.
Settings / Personal Information
My Settings contains account identification information like your username, email address and security phone numbers. You also have the ability to update the fields within this section. My Settings includes:
- Personal information - This is where we display the name registered to the account as well as your masked user id. If applicable, contact information will also displayed.
- Login & Security - This is your Online Banking username, password and delivery methods for receiving your verification codes
- Other settings - Features like Rename & Hide accounts, Alerts & Notifications and Text message banking.
Your contact information is where we will communicate your account-related information to you.
This feature allows you to add or change your mailing and email addresses used by Online Banking. You may be required to confirm the new email address entered. Please note that a number of Online Banking Services, such as updating your password and login security information, rely on your email address as a method of confirming account changes and requests.
To change your mailing and/or email address:
- Log in to your online banking account.
- Click on the My Settings link in the upper right hand corner.
- Click "edit" and enter your new mailing and/or email address.
- Click Save to update your addresses on record. A confirmation message is displayed
This feature allows you to add or change the email address used by Online Banking. Please note that a number of Online Banking services, such as Update Password and Update Security Options Requests, rely on your email address as a method of confirming account changes and requests.
If available, you may have the option to receive periodic email notifications regarding special offers and promotions. If your email is not on file, and you elect to receive email promotions, you will be asked to supply it.
To receive email promotions, select the option and click Save.
If available, you may have the option of receiving its newsletter via email. If your email is not on file, and you elect to receive electronic newsletters, you will be asked to supply it.
To receive newsletters, select the option and click Save.
These security measures have been implemented to improve your Online Banking security. The login security uses a verification code to authenticate yourself via text message and/or a voice call to ensure that it's you trying to access your Online Banking accounts. The options on how to receive your verification codes are provided during the login security setup.
What is Login Security?
Login Security is an online security feature that provides an additional layer of protection from fraud and identity theft by preventing unauthorized access to your secure financial information. Login Security uses technology to verify your identity.
Why do I need to use Login Security?
Login Security allows us to recognize you as the true owner of your account by recognizing not only your login information but also your computer. If we don't recognize your computer, you will be requested to receive a new verification code sent to your phone either via text or voice call in order to authenticate yourself into the Online Banking experience.
Do I have to receive a verification code every time I log in?
In order to bypass the verification code on subsequent logins, you can select to remember your device upon logging in so that we recognize your device the next time you log in and not require you to complete this step again.
Can I login from multiple computers and browsers?
Yes you can, we support most of the commonly used browsers. If you log in from a public computer, you will have to use a verification code to gain access.
Can I still login to my account from anywhere?
Yes, this feature does not prevent you from logging in from any computer. If we do not recognize the computer that you are using then we will simply ask for additional information that only you know (a verification code) before allowing you access to Online Banking.
You can change your username in the My Settings. Click the Update username link and enter a new username that matches the username guidelines described below, then enter your current password and click Save to change your Online Banking username.
- Must be at least six characters long and no longer than 20 characters
- Cannot be all numbers (can be all letters or characters)
- Can contain letters, numbers and the following characters: @$*_-=.!~
- Cannot contain any whitespace (spaces are not allowed: including before, in the middle of, or after the username)
Upon successful entry, an email will be sent to the email address that is on file within Online Banking. This change will take place immediately and be recognized across the Online Banking system.
Changing your password couldn't be easier. Just click the My Settings tab at the top right of the page and then click Update password. Enter your current password, then the new password and confirm the new password in the fields provided. When everything looks good to you, click the Save to change your password.
- Must be at least six characters long and no longer than 32 characters
- Must contain characters from at least two of the following three categories:
- Letters
- Numbers
- Any special characters
- Cannot contain any whitespace (spaces are not allowed: including before, in the middle of, or after the password)
- Passwords are case sensitive
Like all passwords, it is important to keep your Online Banking password confidential. If you forget your password, you can use the Forgotten Password feature by clicking on the link where you log into Online Banking. Or, you can contact us to receive a new one.
Also, for increased security, periodic password changes may be imposed by us. If you are required to change your password you will be prompted to do so when you log in to your Online Banking session. When this occurs, you will receive a warning message when logging in that your password will soon expire.
Click on My Settings find the Update security options link and update the contact methods that you would like to use.
You can add a new phone number by typing in a new value in the field or you can delete an existing number by clicking the Remove (X) icon (if there is more than one phone added). To update an existing number, you can remove it and add the correct value by putting that in the field.
Once a phone has been added, it can be enabled for Text Message by clicking Enable for text? When you click that link, you'll receive a text message on your phone with the verification code. You can type in that verification code in the field and click confirm. Your phone is now enrolled for receiving verification codes through text message. If you no longer wish to receive text messages on a phone, remove the phone (if you have more than one phones added) using the Remove (X) icon and add the number back by typing it in the field.
If available, you may have the ability to change account descriptions (names) for easier recognition. With this feature, you may also elect not to display selected accounts. Selecting the Rename & Hide accounts displays all accounts that may be given an easily recognizable name. To use this feature :
- Click on My Settings
- Click on the Rename & Hide accounts link and all the accounts will appear showing the default names.
Assigning a new description to any account displayed:
- Remove or modify any characters from the account nickname field you wish to change.
- Enter the new name of the account(s) in the account description field.
- Click on the Done button to save this entry, the newly named accounts will now appear on the list of accounts.
Hiding a Displayed Account:
- Locate the account to be hidden. Unselect the Show account option next to that account and the account name will no longer be seen within Online Banking.
- Click the Done button to save this change.
Transfer Information
The Account Transfer service allows you to transfer funds between accounts.
To transfer funds between authorized accounts:
- Click the Account Transfer option.
- Enter the Transfer Amount. Include a decimal point but do not include a dollar sign or comma.
- Select the account from which the amount will be debited using the From Account drop-down list. If the designated account is subject to Regulation D, then Regulation D transfer limit or check limit information will be displayed, if available. Regulation D sets a monthly limit on the number of transactions that can be made from certain accounts such as savings accounts.
- Select the account to which the amount will be deposited using the To Account drop-down list. If the designated account is a loan, then loan payment amounts or loan payoff amounts will be displayed when viewing this field.
- If you have the ability to make a loan payment: Select the radio button for the type of transfer you are making: Standard or Overpayment or Multiple Payments or LOC Paydown. The default is Standard. If selecting Overpayment, your payment will be more than the standard payment amount. If selecting Multiple Payments, your payment will be designated to qualify for the designated number of multiple payments. If selecting LOC Paydown, your payment will be designated to paydown the entire balance of the line of credit account selected.
Note: If there is additional text next to the Overpayment Radio Button (e.g. "Overpayment (Principal Only Payment)"), you will know how the extraneous funds will be applied. If there is the Loan Overpayment Drop Down list, you can select one of the available options to specify how you want the extra money applied (e.g. "Excess to Payment to Principal").
- Enter a note to include with the transfer in the Memo field (optional). Click Transfer Funds to initiate the transfer. A prompt appears allowing you to confirm this transfer. If the entered information is incorrect, click Cancel and re-enter the information. Or if the entered information is correct, click the Confirm Transfer button. A Transaction Report Record will indicate the transfer was successful.
Note: For real time processing, the transfer will take place immediately provided there are no holds on the accounts and the funds are available for transfer. For batch processing, the transfer will take place the next business day. Also, a unique reference number is assigned to successful as well as unsuccessful transfers.
The Schedule Transfers feature allows you to transfer amounts at scheduled times between your accounts. Transfers may be added, edited, or deleted at your discretion. The scheduled transfer screen shows the scheduled process date, the frequency of the transfers, the amount to be transferred, the From account, the To account and account numbers. If offered, you can opt to receive email confirmations, the added benefit of an email confirmation message later confirms the scheduled transfer has been processed.
After a one-time transfer or a final recurring transfer has processed, it will be deleted and will no longer appear on the Scheduled Transfers Summary page. Completed transfers can still be found within the Account History page. Also note that if you are locked out of Online Banking as a result of multiple failed login attempts, your scheduled transactions will not be processed until your Online Banking access has been restored and you successfully log in again.
Note: A status column may appear on the summary screen indicating whether a scheduled transfer is "Scheduled", "Processed", or "Not Transferred." If a transaction did not successfully transfer, then you can click on the "Not Transferred" link for that transaction and the failed transfer error message will appear indicating the reason for the failed transfer.
To view scheduled transfers
- Click the Scheduled Transfers option, and the Scheduled Transfers Summary screen appears. This screen displays all current scheduled transfers.
- Click Add. The Add Scheduled Transfers screen appears.
- Enter the amount to transfer.
- Select the account from which the amount will be debited using the From Account drop-down list. If the designated debit account is subject to Regulation D, then Regulation D transfer limit information will be displayed, if available. Regulation D sets a monthly limit on the number of transactions that can be made from certain accounts such as savings accounts.
- Select the account to which the amount will be deposited using the To Account drop-down list.
- Enter a note to associate with the transfer in the Memo field. (Optional).
- If making a loan payment and if overpayments are offered, select the radio button for the type of transfer you are making: Standard or Overpayment. The default is Standard. If selecting Overpayment, your payment will be more than the standard payment amount.
Note: If there is additional text next to the Overpayment Radio Button (e.g. "Overpayment (Principal Only Payment)"), you will know how the extraneous funds will be applied. If there is the Loan Overpayment Drop Down list, you can select one of the available options to specify how you want the extra money applied (e.g. "Excess to Payment to Principal").
- Enter the Start Date in the field provided. A calendar icon located alongside the start date fields is provided to assist you. Simply click on this icon to view the current month calendar. Calendar months may be changed by clicking the forward or backward arrows.
- Depending on the frequency of the transfer, select the radio button corresponding to how often the transfer will occur (e.g., One-time, Weekly On, Monthly On, or Twice-Monthly On).
- Using the day and date drop-down lists, choose the day and the date for the transfer to occur. Please note that we do not allow the start date to be today's date for a scheduled transfer. If you require a transfer to be conducted today, please conduct a one-time transfer within the Account Transfer feature.
- Select one of the three radio buttons corresponding to when the transfer will end:
- Specify the Number of transfers in the field provided. The number of transfers must be greater than 0.
- Enter an End Date in the fields provided. A calendar icon located next to the End Date field will appear to assist you. Simply click on this icon to view the current month calendar. Calendar months may be changed by clicking the forward (>>) or backward (<<) arrows.
- Select the No End Date radio button to indicate that this recurring transfer will continue at the specified frequency until you delete it.
- If E-mail Notifications are offered: In the E-mail Notification To field, type in the email address where you want to receive a notification of success or failure with each scheduled transfer attempt. In the E-mail message field, include your E-mail message regarding your scheduled transfer. In this message, do not include account numbers, social security numbers or any other confidential information.
- If available and if desired, click on the checkbox option to have a notification sent to you after the last scheduled transfer has completed.
Note: If you make an error, click Clear to reset all fields to start over, or click Cancel to return to the Scheduled Transfers Summary screen
- When the transfer information is completed, click Save Transfer. A confirmation screen appears. Click Confirm Transfer to accept. Your transfer information will now appear on the Scheduled Transfer Summary screen
- From the Scheduled Transfers Summary screen, identify the transfer to be edited, then click the Edit link. This link is located on the right side of the scheduled transfer entry.
- The Edit Scheduled Transfer screen will appear with the transfer account information displayed along with the selected frequency and end date, if specified.
- Add or modify the information as needed. Click Reset to return the field to the original entry, or click Cancel to return to the Scheduled Transfer Summary screen.
- When the edits are complete, click Save Transfer to save your changes.
- From the Scheduled Transfers Summary screen, identify the transfer to be deleted, then click the Delete link. This link is located on the right side of the scheduled transfer entry.
- The Delete Scheduled Transfer screen will appear with the transfer account information displayed along with the selected frequency and end date, if specified.
- Click Delete. The delete confirmation screen will appear prompting you that the payment transfer is about to be deleted.
- Click Delete once again to complete the deletion, or click the Cancel button to abort this deletion and return to the Schedule Transfer Summary screen.
The Scheduled Transfer Calendar is provided to assist you in determining payment transfer start and end dates. Simply click on the calendar icon. You may select the month by using the (>>) forward or (<<) backward buttons or select the month or year using the drop-down lists.
Today's date is seen highlighted in yellow and payment selected dates are highlighted in green. Weekends and financial institution recognized holidays are shown shaded. First click the month, then the year, and finally the date. Clicking the date causes all date information (month, date, year) to be added to the Scheduled Transfer start or end date fields. Scheduled Transfers cannot be scheduled for dates earlier than today's date.
The Confirm Scheduled Transfer screen displays the details of the scheduled transfer that was just entered. Please be aware that if a specific number of transfers was input on the entry screen, the Number of Transfers field will be displayed. If an End Date was entered or selected, the End Date field will be displayed. If the No End Date radio button was selected, the text "No end date" will be displayed in the End Date field.
The following reasons may account for a scheduled transfer not to process:
- FROM : account may be overdrawn
- TO:/FROM : account may not allow transfers
- Transfer amount exceeds the amount allowed
If a transfer fails to process, an email message will be sent to you if you entered your email address in the E-mail Notification To field when scheduling the transfer. In addition the email message, a Reason for the Failure message will appear to describe why the failure occurred.
Stop Payment Information
The Stop Payment feature is an optional service that allows you to initiate a stop payment on a check. If offered, you may also have the ability to stop payment on a series of checks, check the status of a stop payment, or release a stop payment request.
- Click the Stop Payment option, the Stop Payment screen appears
- Click the radio button appropriate for the Type of Request. Your choices may include: Stop Payment on a Check, Check the Status of a Stop Payment or Release a Stop Payment on a check
- Choose the account number from the drop-down menu
- Add any comments in the Comment field
- For a Single Check, enter the check number, amount, date the check was issued and the payee name. (Note: Some of these fields are host system dependent and may not appear on your screen.)
- For a Range of Checks, click the Multiple Check Information option and enter the numerical sequence of check numbers to include in the stop payment request
- Click Submit. A stop payment confirmation screen appears
- Click Cancel to clear all the fields and start over, or click Confirm Check Stop to submit the request for processing
The Stop Payment request form is used to request a stop payment on unprocessed checks. Requests will be held for 6 months after which they will become inactive.
- Click the Stop Payment Request option
- Enter the Date shown on the check
- Enter the Check Number
- Enter the Amount of the check
- Enter the Payee name
- Enter the Account Number from which the check was written
- Add any Comments or Instructions
- Click Submit. A confirmation appears indicating that your stop payment request has been submitted. You may also click Cancel to reset all fields and begin again